
If you follow my Instagram (@Jamie_L_Mac), you’ve known I’ve been up to something that includes a lot of denim. Well two weeks in the making, you finally get to see the results of the painstaking hours I put into my newest bag.
First, let me share my inspiration, from Pinterest of course.
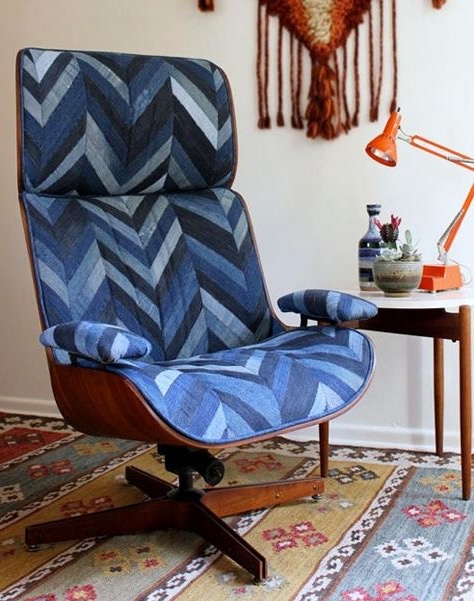
This beauty caught my eye. I was looking for what to do with old jeans. I had a ton. I love the idea of creating a pattern and covering a chair. A chair I do not have or need. So I saved this and figured it would never be more than something for me to ogle.
I don’t know about you but my brain likes to let things roll around in there for a while. I take in a lot of info but nothing becomes apparent right away until…
Inspiration two:
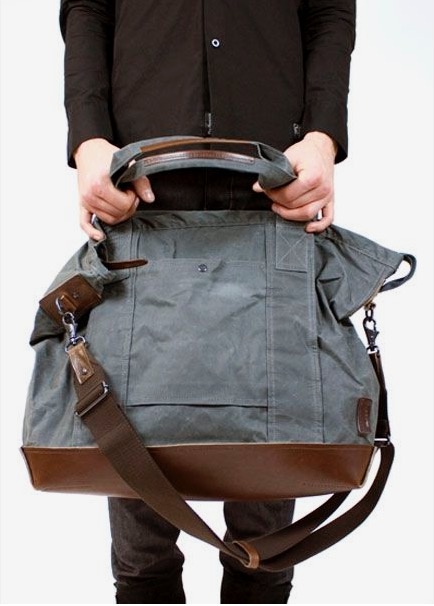
Now this guy has a “pattern“. Meaning it kind of gives you the proper dimensions and what not to make it but you’re still kind of on your own. But that’s okay because that’s usually how my bags go.
I really needed a larger tote for all my crap for work. My purse, lunch bag, extra pair of shoes (when I wear heels), sweater (because its always freezing) laptop, charger, and other random things you can find in the bottom of my bag, all needed some breathing room. Usually I come to work with a bag that is overflowing with my necessities. None of these items can stay at work so hence the to and fro truckage.
Needless to say this bag is HUGE and I was excited! I could fit all of my cats in there and still have room for a unicorn. Mary Poppins ain’t got shit on me! I can’t really give a lot of instruction on how I put the whole thing together because it was, “well this looks right” and then SEW!
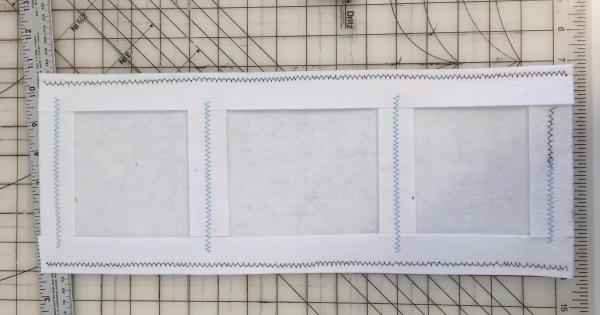
I wanted that nice flat bottom you see in the inspo pic. I found a really heavy interfacing. I even reinforced that interfacing with more of the super heavy interfacing.
I cut all the denim in long lengths but all 2 1/2″ wide strips. I was using a 1/4″ seam allowance so this would leave me with 2″ wide strips when sewn. I didn’t top stitch any of them. I toyed with the idea for only a second and realized how much more time that would be. I ended up ironing the crap out of each vertical set before sewing them to the neighboring strips and ironing again.
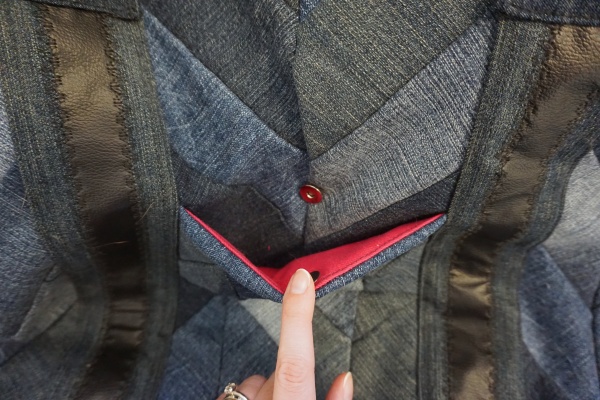
Added the pocket to the front. I debated if I wanted a plain pocket or if it should match the rest. Obviously from the previous pic, I went with matching. If I was really crazy, I would have cut the strips to match what was going to be underneath and the pocket would have blended. I did however cut a pink lining and added a magnetic snap.

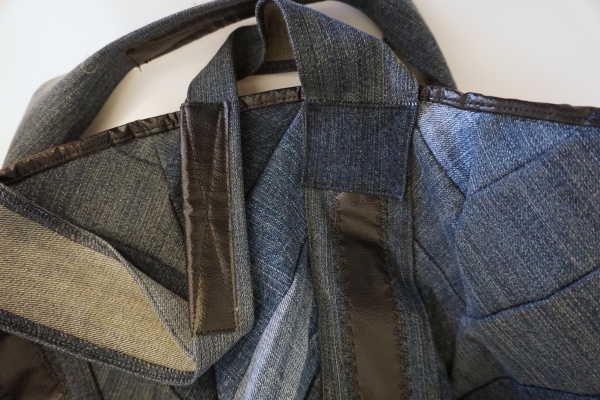
On the struts, I added the same pleather that was on the bottom of the bag. It seemed weird to not include it other places. I even went a little wild and added a decorative stitch on them…and then to the bottom… and lastly on the top… I can’t help myself sometimes.
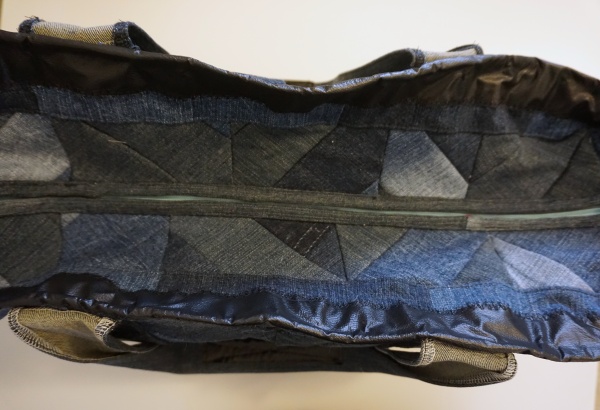
Speaking of the top. This bag was supposed to be about 3″ taller. There was no way I needed it to be so big. I hacked off the top but kept it just in case. Lucky that I did because I decided it would be great way to finish on the zipper area. Granted it wasn’t wide enough because the bag is 8″ deep. I added some plain strips on the sides to make it work. I did add more pleather at this point too to cover the raw edges of the pieces matching up. My sewing machine was working overtime and there were some spots that needed some hand cranking to get through. Bought that long zip for $.75. Such a deal!
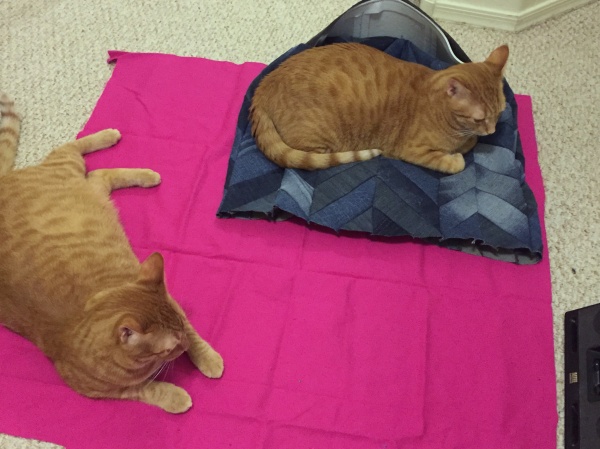
Since I went with the pink lining on the pocket, I decided the whole thing needs a pink lining. Check out my helpers doing their thing.
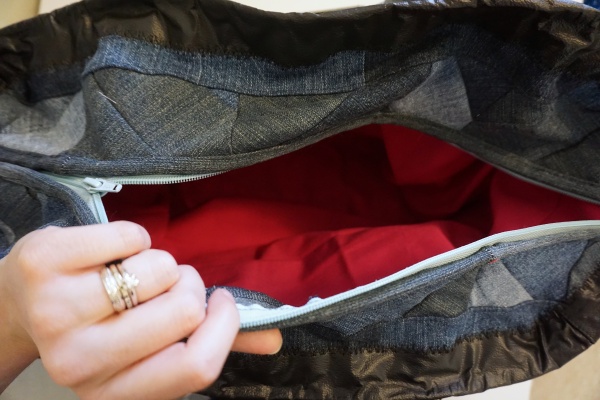
I didn’t do anything fancy on the inside. Just replicated the outside of the bag. No extra pockets or fun. I didn’t have enough fabric after I cut what I needed for any extras. 😦 I wanted to have a separate compartment for my laptop but oh well.
The handles are a mix of denim and pleather. I made the pleather pieces wider than the “pattern” called for. I think I actually doubled the width. I did omit the long shoulder strap. There was no need for that. I can’t fathom trying to swing this big boy across my body.
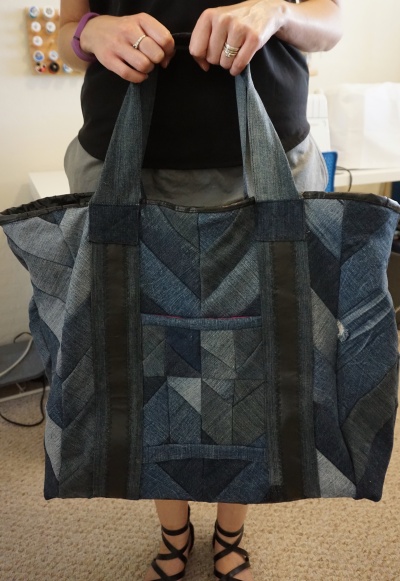
Here’s the big beast in all his glory. I’m pretty tickled with how it turned out. It took so much time and I really had to push through. Being so time consuming really, put me off but I’m so happy I prevailed. Final dimensions: 16″ height, 17.5″ width, and 8″ deep.
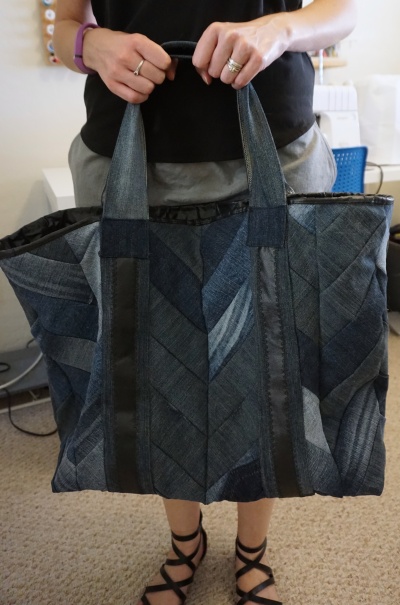
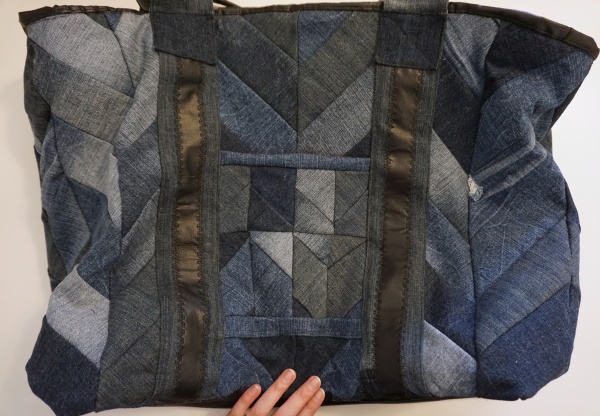
The back is just as awesome as the front. I didn’t mean to spend my Me-Made-May on such a large project but inspiration hit and I couldn’t say no. How did you spend your Me-Made-May? Any special projects? Completed? In the works?
